The difference between an impressive beard and an unkempt mess often comes down to two critical boundaries: the neckline and cheek line. These seemingly simple edges define your beard’s structure, frame your face, and communicate your attention to detail. Master these fundamental shaping techniques, and you’ll elevate your beard from good to exceptional.
Understanding Beard Architecture: Why Lines Matter
Before we dive into technique, let’s understand why proper beard shaping matters beyond aesthetics. Your neckline and cheek line serve specific structural and visual purposes that directly impact how your beard—and by extension, you—are perceived.
The neckline creates separation between your beard and neck, preventing the dreaded “neck beard” appearance while elongating your face and defining your jawline. A well-executed neckline makes your beard look intentional rather than accidental, groomed rather than neglected.
The cheek line controls your beard’s upper boundary, balancing fullness with clean lines. It determines whether your beard looks wild and overwhelming or polished and purposeful. The right cheek line can actually reshape the appearance of your face, creating visual balance that complements your natural features.
Together, these lines create a frame that showcases your beard at its best. They’re the difference between “he has a nice beard” and “he clearly knows what he’s doing.” If you’re just starting your beard journey, check out our beard trimming basics guide before tackling advanced shaping.
The Perfect Neckline: Finding Your Natural Boundary
The neckline is arguably the most important—and most commonly botched—element of beard shaping. Too high, and you lose the fullness that makes your beard impressive. Too low, and you look unkempt and undefined. The sweet spot creates a crisp boundary that appears effortless and natural.
The Two-Finger Rule: Your Starting Point
Place two fingers horizontally above your Adam’s apple. This point serves as your neckline anchor—the curved line that runs from ear to ear should pass through this spot at its lowest point. This rule works for most face shapes and beard styles, though you’ll adjust based on your specific features.
The neckline isn’t a straight line—it’s a U-shaped curve that follows the natural contour where your jaw meets your neck. Imagine drawing a smile under your chin; that natural arc is your guide. The line should curve upward as it approaches your ears, following the back edge of your jaw.
Step-by-Step Neckline Execution
Start by clearly visualizing your line before you make any cuts. Use a finger to trace the intended path from ear to ear, ensuring both sides match and the curve feels natural. This mental mapping prevents the most common mistake: removing too much in a moment of uncertainty.
Position yourself in front of a well-lit mirror with a second mirror behind you, or use your phone’s front camera to see your neck clearly. Tilt your head back slightly—not dramatically, as this distorts your natural neckline—just enough to see the area clearly.
Using a precision trimmer without a guard, start at the center of your neck, directly under your chin. Remove everything below your established line with short, controlled strokes. Work outward toward each ear, constantly checking symmetry and maintaining your curved path.
The area immediately below your jaw—the shadowy part between your beard and neck—should be clean and crisp. This contrast is what creates definition. Don’t gradually fade this area; the transition should be deliberate, moving from full beard to clean skin within a quarter inch.
Common Neckline Mistakes and Fixes
The most frequent error is creating a neckline that’s too high, often due to nervousness about going too low. If you’ve done this, resist the urge to keep lowering the line on the opposite side to match—you’ll end up with no beard left. Instead, let it grow for two weeks and start fresh with a lower line.
Another common mistake is making the curve too dramatic or too flat. An overly curved neckline looks artificial and emphasizes a double chin. A perfectly straight line looks unnatural and doesn’t follow your facial structure. The goal is a gentle, natural-looking arc.
Asymmetry plagues many DIY beard shapers. If one side of your neckline sits higher than the other, identify the correctly positioned side and carefully adjust only the higher side. Make tiny adjustments, checking frequently. It’s always easier to remove more than to wait for regrowth.
Mastering the Cheek Line: Control Without Severity
The cheek line defines where your beard ends and your upper face begins. Unlike the neckline, which has fairly universal rules, the perfect cheek line varies significantly based on your facial structure, beard density, and personal style. However, certain principles guide all successful cheek line shaping.
Natural vs. Defined: Choosing Your Approach
Most men fall into one of two cheek line camps: natural or defined. The natural approach maintains your beard’s organic growth pattern, only removing obvious strays and creating a soft, gradual transition. This works well for full, dense beards and creates a more casual, approachable look.
The defined approach creates a clear, intentional line between bearded and clean-shaven areas. This sharper boundary appears more polished and formal, working particularly well for professional environments and special occasions. It requires more maintenance but offers more control over your beard’s visual impact.
Neither approach is inherently better—they serve different aesthetic goals. Many men maintain a natural cheek line daily and sharpen it for important events, getting the best of both worlds. Understanding both techniques gives you flexibility.
Finding Your Ideal Cheek Line Height
Your ideal cheek line height depends on several factors: natural growth pattern, beard density, face shape, and desired style. However, a reliable starting point exists for most men.
Draw an imaginary line from the corner of your mustache to the top of your sideburn where it meets your hairline. This diagonal creates a balanced boundary that complements most face shapes. Your cheek line can follow this path exactly or run parallel but slightly below it.
Men with rounder faces often benefit from a slightly higher cheek line, creating the illusion of angularity and structure. Those with longer, narrower faces might prefer a lower line that adds width and fullness. The key is working with your natural features rather than fighting against them.
Before making any permanent cuts, use a white eyeliner pencil (yes, borrowed from a partner or purchased specifically for this purpose) to draw your intended line. Live with it for a day, examining it in different lights and settings. This test run prevents irreversible mistakes.
Executing the Perfect Cheek Line
Start with a sharp, clean trimmer and good lighting. Natural daylight is ideal, but if that’s not available, use bright, even lighting that doesn’t create harsh shadows. Shadows can trick you into seeing unevenness that doesn’t exist or missing real problems.
Begin by removing obvious strays—the scattered hairs that clearly fall outside your intended boundary. This creates a rough outline of your final line without committing to specific placement. You’re establishing the general zone, not the precise edge.
Now work on one side at a time, never alternating back and forth. Complete your entire cheek line on one side before touching the other. This prevents the endless cycle of “evening things up” that leads to ever-higher lines and eventual regret.
Use short, controlled strokes that move with your beard’s grain, not against it. Cutting against the grain can cause uneven results and missed hairs that only appear hours later. Take your time—rushing leads to mistakes that take weeks to fix.
After completing one side, step back from the mirror. View your face from normal conversation distance, not pressed close to the glass. Does the line look natural and balanced from this perspective? If so, proceed to match the other side.
Maintaining Symmetry: The Trickiest Part
Achieving perfect symmetry challenges even experienced beard shapers because our faces aren’t perfectly symmetrical. Your beard likely grows slightly differently on each side, and your facial features probably have subtle asymmetries.
The key is creating apparent symmetry—lines that look even from a normal viewing distance—rather than mathematically perfect symmetry. Use visual reference points: does each line start at the same relative point on each sideburn? Does each end at the same position relative to your mustache corners?
Take frequent photos with your phone’s front camera, holding it at arm’s length. The camera’s perspective reveals asymmetries that you might miss in the mirror because you’ve been staring too closely for too long. These photos provide objective feedback.
If you struggle with symmetry, consider using a beard shaping template or guide. These tools, while sometimes mocked, provide consistent reference points that can help you develop muscle memory for even trimming. Once you’ve internalized the correct placement, you won’t need them anymore. For more detailed trimming techniques, review our professional barber secrets.
Advanced Techniques: Fading and Blending
Once you’ve mastered basic neckline and cheek line creation, advanced techniques like fading and blending take your beard to the next level. These subtle refinements create professional-quality results that look natural rather than harshly trimmed.
The Neckline Fade
Instead of an abrupt transition from full beard to clean skin, a subtle fade creates depth and dimension. Using progressively longer guard lengths, create a narrow gradient zone that transitions smoothly.
Start with no guard for the bottom-most section below your neckline. Then use a 1mm guard for a narrow band just above it, followed by 2mm for an even narrower band. This creates a soft fade that maintains a clean boundary while avoiding the harsh “drawn-on” appearance.
The fade zone should be narrow—no more than half an inch at its widest point. The goal is subtlety, not an obvious gradient. This technique works particularly well for men with darker beards where stark contrast can look artificial.
Cheek Line Blending
Similar principles apply to cheek line blending. Rather than a sharp demarcation, create a narrow transition zone using progressive guard lengths. This technique works especially well for the natural cheek line approach.
Start by trimming your main cheek line with your chosen length guard. Then, immediately above this line, use a guard one size shorter for a narrow band. Finally, use a guard two sizes shorter for an even narrower band above that, then clean-shave everything above.
This creates a subtle gradient that makes your beard appear to naturally taper rather than suddenly stop. It’s the difference between “this is where my beard ends” and “this is where my beard naturally fades away.”
Tools of the Trade: What You Actually Need
Precision beard shaping doesn’t require a bathroom full of expensive gadgets, but certain tools make the difference between frustration and success.
A quality trimmer with precision settings: Look for a model with a zero-gap blade option for ultra-close trimming along your lines. Adjustable length settings from 0.5mm to at least 10mm give you the range needed for fading and blending.
A detailed mirror setup: You need to see your entire face and neck simultaneously. A large bathroom mirror plus a handheld mirror for checking symmetry, or a tri-fold mirror setup, works well.
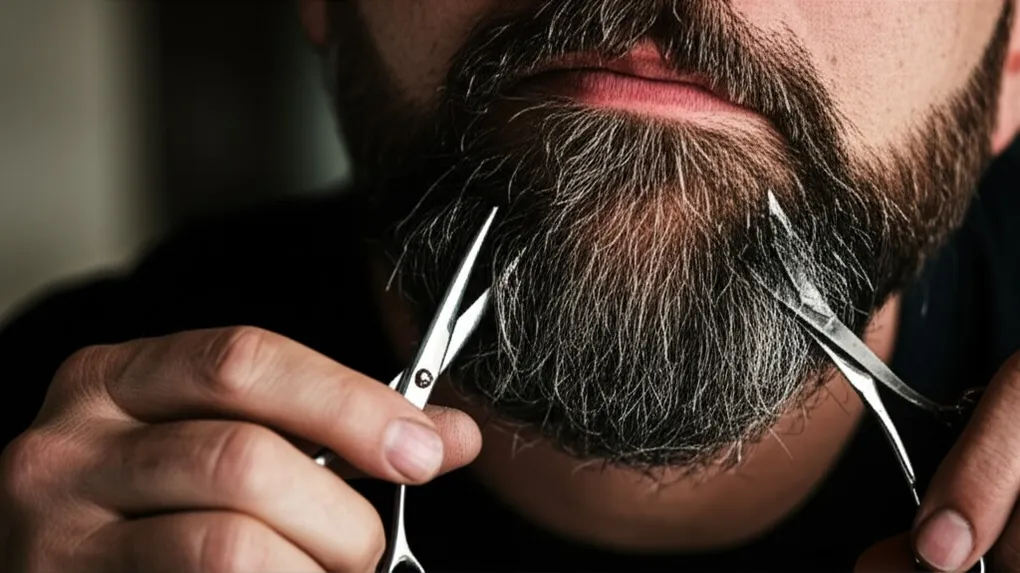
Sharp scissors: For detail work and removing individual stray hairs that the trimmer might miss. Professional barber scissors hold their edge longer and give more control than regular household scissors.
A fine-tooth comb: Essential for lifting beard hairs and ensuring even trimming. Also useful for checking your line work by combing against it to reveal any missed spots.
White or light-colored eyeliner pencil: For marking intended lines before cutting. This simple tool prevents countless trimming mistakes and helps you visualize placement before committing.
Maintenance Schedule: Keeping Your Lines Sharp
Creating perfect lines once is an achievement. Maintaining them requires a consistent schedule that prevents overgrowth while avoiding over-trimming.
For most men, the neckline needs attention every 3-4 days. Below-the-line growth appears quickly and obviously, degrading your clean appearance. Quick touch-ups take just 2-3 minutes with practice.
Cheek lines typically require less frequent maintenance, especially if you’ve chosen a natural approach. Every 5-7 days usually suffices for removing obvious strays while maintaining your established boundary.
Schedule a comprehensive reshaping session every 2-3 weeks where you reassess your lines’ placement, ensure continued symmetry, and make any necessary adjustments. Your face and beard change subtly over time—staying responsive to these changes keeps your shaping looking fresh and intentional.
When to Seek Professional Help
Even with practice and skill, certain situations call for professional assistance. If you’re establishing your initial neckline and cheek line, a session with a skilled barber provides a roadmap you can follow for maintenance. They’ll find the optimal placement for your specific features and show you where your natural boundaries should fall.
Fixing mistakes—especially significant asymmetry or lines that have crept too high—often benefits from professional intervention. Barbers see these issues regularly and can either correct them or advise you on how to grow out and reset.
Before major events where your appearance carries extra weight, a professional shaping session ensures you look your absolute best without the risk of DIY disasters. The cost is minimal compared to the confidence of knowing your beard is perfectly shaped. For additional grooming preparation tips, see our guide to date night beard grooming.
Patience, Practice, and Perspective
Mastering beard shaping is a skill developed through practice, not perfected in a single session. Your first attempts will likely be imperfect—that’s completely normal and expected. Each trim teaches you something about your beard’s characteristics, your face’s contours, and your own technique.
Give yourself permission to learn gradually. Start with conservative adjustments, removing less than you think necessary. You can always take more off, but you can’t put hair back. This cautious approach prevents dramatic mistakes while building your confidence.
Remember that perfect shaping serves a larger purpose: showcasing your beard and enhancing your overall appearance. The lines themselves aren’t the goal—they’re the frame that lets your beard shine. Once you’ve internalized proper placement and technique, shaping becomes a quick, automatic part of your grooming routine rather than a stressful ordeal.
Your beard is a long-term project that gets better with time, attention, and skill development. Invest in learning proper shaping, and you’ll enjoy the dividends for years to come in compliments, confidence, and the satisfaction of genuine craftsmanship.